

Rainbows and sunshine and ponies, oh my! My dearest, most favourite, little baby sister turned 21 this month. Shannon is actually my best friend’s little sister, try to keep up people.

Both of these gorgeous girls are my family, and I love them both so much!
(Shannon on the left, BecFace on the right).
(Shannon on the left, BecFace on the right).
Twenty ten is a big year in cakes for Miss KayB, for example in October this year I will be attempting my first ever wedding cake. OH GAWD! But I am now cool, calm and collected after completing my first 21st cake (excluding my own, which looking back now, was a disaster!).
Earlier this year, Shan emailed me to ask the following..
“dearesttttt big sister,
i know this is way in advance, but i wanted to ask you a massive favour and give you time for creative inspiration if it’s a yessss,
but for my 21st instead of a present i would totally LOVE it and be HONOURED if you would make my cake!!!!??”

i know this is way in advance, but i wanted to ask you a massive favour and give you time for creative inspiration if it’s a yessss,
but for my 21st instead of a present i would totally LOVE it and be HONOURED if you would make my cake!!!!??”

Little did she know that I’d already been discussing ideas with bigger sister. I would have been horrifically offended had she not asked me, and I was kind of insulted that she felt she even had to ask. I was making her a cake with or without her approval. Cause that’s just how I roll.
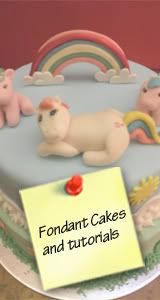
When Shannon and I were teeny tiny I made her play Barbies with me, because no one else would. I still have some of my Barbies. Yeah, true fact. I actually screamed when my in-laws gave me matching Twilight Barbies dolls for Christmas last year. Edward Cullen and Ken combined was just too much for me to handle. I lost it. Then I teased Shannon because she didn't have a set. I was now the cool sister. It only took 22 years. But Shannon’s favourite was/still is My Little Pony. Much to my detest, it was to be a My Little Pony cake, not barbie. Dang it.


I wanted to give you all a complete run down on how I pulled this cake together, but unfortunately I was too busy trying to get every detail right that I forgot to get photos. Oops. So here is the quick rundown, with a few tips and tricks for y’all.

This bad boy is made of a 10 inch butter cake, with buttercream frosting, and a 8 inch mud cake, with chocolate ganache filling. Among other things, these two cakes combined contains; 1/2 kilo of chocolate, 1.2 kilos of butter, 10 eggs and just over a kilo of sugar (caster and confectioners). That equals yumminess/early onset heart failure.
Tip: I made these cakes a week before serving and froze them. Double wrap them in gladwrap then aluminium foil to stop any freezer burn. Once defrosted, slice in two even halves and coat liberally with apricot syrup to ensure the cakes stay moist (equal parts apricot jam and boiling water. Whisk until lump free).

I decorated the second tier of the cake with fondant grass. Not only did it look pretty, but it helped to hide the uneven base of the second tier.
Tip: To make fondant grass, take a ball of semi dried fondant and go to town on your cheese grater. Stick the grass onto your cake with a little water.

Stacking cakes can seem really frickin scary. The final cake felt like it weighed about 10kgs! For this reason, you need to provide your bottom tier with support, otherwise your top tier will go crashing through the bottom cake. Perhaps not that quickly, but more a slow, painful, drawn out, sinking motion. And probably at some horrible time, like when the birthday girl is about to blow out the candles. We want to avoid this at all costs. Agreed?
Tip: All cake decorating books/experts suggest using special cake dowels or straws, which are inserted into the bottom tier, so the top tier has something stable to sit on. These can be expensive and are only available at cake decorating stores. I have taken a liking to using chopsticks as an alternative. Specifically designed for use with food, and at 2 bucks for a pack o' twenty, they are a total bargain. Stick one into the cake, mark the height needed and chop all of them to the same length. Then insert back into the cake, arranged as to support the weight of the top tier evenly. Easy peasy. Just don't forget to pull the chopsticks out of the cake before serving. Or you could have a lawsuit on your hands. And I don't have a tutorial to help you with that.


Happy birthday my dearest baby girl. Looking forward to another 21 fun and fabulous years!
Because I didn't get to give you all a full rundown on the making of this cake, please feel free to ask any questions about the cake or working with fondant below by leaving a comment.


