Showing posts with label tutorial. Show all posts

Sunday, November 11, 2012

Ombre Wedding Cake Tutorial


I had the exhilarating task of making my SECOND wedding cake this year for my dear friends, Darcy and Elyse. The Bride sent me some inspirational photos of soft iced cakes and a colouring concept that I wasn't familiar with - ombre. While the faded colour of this cake may look challenging to achieve, it was actually really easy to pull off. Just make sure you do some bicep exercises leading up to the task because all that icing killed my arm!

Soft Iced Ombre Buttercream Wedding Cake - How to.

What you'll need.
2 x batches of butter cream icing (divided into 5 batches)
Bowls
Large flat blade cake spatular
Gel colouring in your chosen colour


Start by filling and stacking your cakes, then cover in a thin crumb coat. Use uncoloured butter cream for this. Pop in the fridge to set.

While your cakes are in the fridge, start colouring your icing. I used four colours for my cake, fading from an off-white on the top down to a bright pink on the bottom. The best way to achieve the faded colour range is to work from the top/lightest colour down. You can always make you're icing darker, but it's harder to fix/lighten the icing once coloured. Don't start colouring the next batch of icing until you've managed to get the colour before it right. Try not to make the shades of icing too far apart, as they will blend and mix into each other once you put them on the cake. Also, don't forget that you will need more icing for the darker/base colours as there is more surface area to cover!


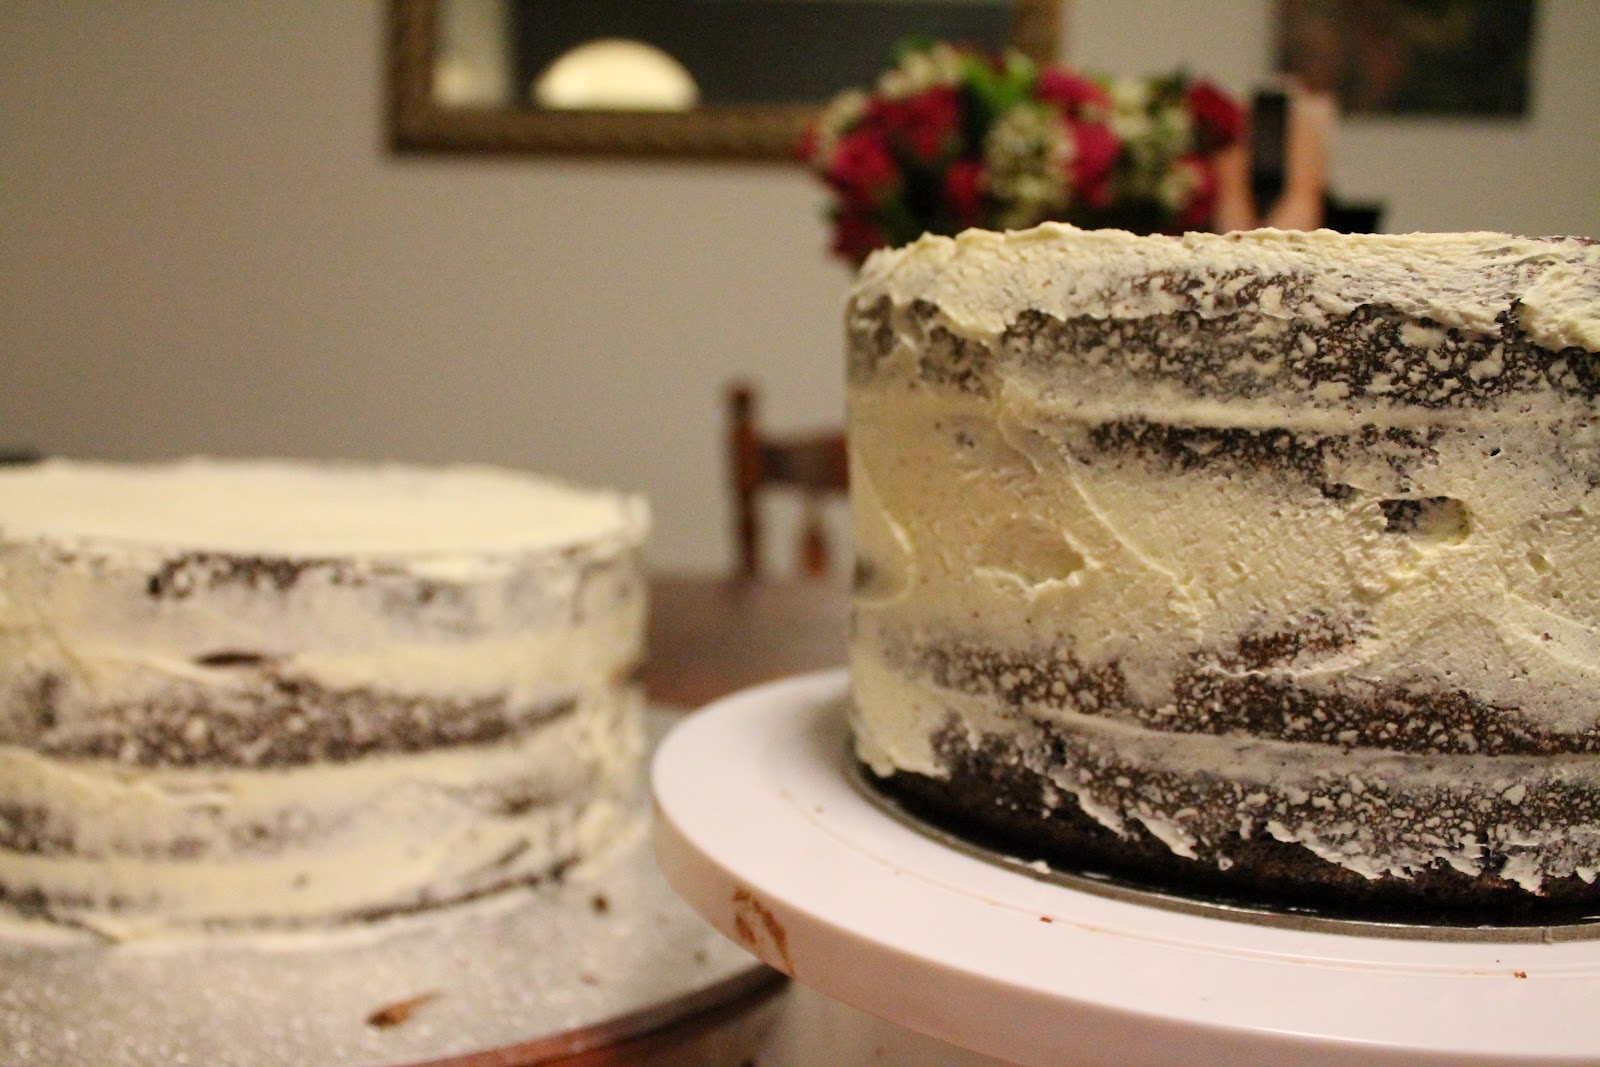
I'm trying to achieve a soft and textured look, so I don't have to worry about evenly icing the cake. Start by applying a thick layer of icing in your darkest colour to the bottom half of your base cake, I used a small butter knife to do this. Repeat with the second colour. 


Once the cake is covered in both colours, start to even out the icing with your large flat blade spatular. You will notice that once you start to smooth and even out the icing, the two colours will blend together slightly which makes the colours look as though they're fading into each other.


To achieve the rustic, soft iced look, I take my large flat blade spatular and hold it at a slight angle so the tip of it cuts into my icing as I spin my cake turntable.

I'm really happy with how this cake turned out - and so were the Bride and Groom, which is the most important part! It can be a little bit fiddly, but the overall look is so romantic and rustic. Well worth the effort!


And because it was by far the most beautiful wedding I've ever had the pleasure of attending, there is a lil' video I put together (all shot on my iPhone, hence the crappy quality!) But you get the idea - this video DOES NOT do the wedding justice, it was absolutely stunning!

Congratulations, Darcy and Elyse!! xxx


Darcy & Elyse's Wedding from Kimberley Burrell on Vimeo.

Tuesday, May 15, 2012

Chocolate cake for skinny people


My dear surrogate mother, Mumma Fish, recently had a birthday. She also recently lost like, a billion kilograms. Ok, not that much, obviously. She always looked fabulous, but now she looks crazy skinny fabulous. I wanted to make her a 'healthy' birthday cake but then I remembered that healthy is boring. So I made my super moist chocolate mud cake and put fruit on it, because fruit is healthy. And when you pair fruit with chocolate, it cancels out the calories. That's just science, really.

 Make yourself a super moist mud cake, then slice it in half. Make a big bowl of ganache. 2 parts dark chocolate, 1 part pure cream. We want this ganache to set hard.
 Fill the middle of the cake with ganache.
 Keep filling.. 
 Grab some luscious, plump, juicy, sexy berries. Wash and set aside to dry off.
 Ganache your cake. We're going for a rustic look, no need to be fancy.
Pipe a border to hold in all the fruit. If you don't have a piping bag, just use a thick plastic sandwich bag and snip off the corner.
  Pile on your luscious, plump, juicy, sexy berries.
 Add more berries for decoration. Dip them in melted chocolate. Or white chocolate. Whatever takes your fancy. You could dip them in sprinkles as well. Yeah, do that. I wish I had sprinkles. 
 Add more chocolate. Just because. 
 Serve on a vintage, sliver cake stand with matching candles (note: cake stand and candles are optional. You could just eat it with a spoon, standing along in your kitchen. That would work well too). 
Attempt to claim a large portion of the cake by licking a selected area. This is called 'dibs!' as demonstrated here by silly surrogate sister. She lost a small section of her tongue doing this. Kidding.

Tuesday, March 13, 2012

Drum Cake: Tutorial

Yo kids. Here is the Drum Cake tutorial. Enjoy!
You will need
1 round ganached cake
Rolling pin/corn flour
Fondant (1 batch coloured, 1 batch white for top of drum and accessories)
Tooth picks
Edible silver paint - available from all good cake decorating stores. You can use a luster dust, but I find this must easier to use and results in a better colour.
Water
Paint brush

This cake is pretty straight forward, but a tad bit fiddly at times. Take your beautifully ganached cake and cover it in your chosen colour fondant. Next, take your white fondant and roll out large enough to cover just the top of the cake - this will be the ‘head’ on your drum (also known as a drum skin).
Trim the edges of the white fondant - it doesn't need to look perfectly neat as we are going to add another ring of fondant.

Here is where it gets tricky - roll out a piece of white fondant the same diameter as the cake, about 3cm high (the height is dependent on the size of your cake.. measure a small bit and hold it up to your cake to get a better idea). Wrap this piece of fondant around the base of the cake, attaching it with a small bit of water applied with the paint brush.
Roll out a second piece of white fondant the same size.. this is where it gets tricky. You need to attach this piece to the top edge of the cake, while allowing it to edge above the top of the cake. I didn't do this, but in hindsight I would have measured out a ring of toothpicks that I stick into the cake for the strip of fondant to sit on top of. As I mentioned, this bit is tricky and a bit fiddly as the fondant is still soft. Once you are happy, and the fondant has had a little bit of time to dry and stiffen, paint it with the edible silver paint.
Now that you have the top and bottom ring of fondant attached, it’s time to add the accessories.. also known as the drum lug!
Roll out white fondant nice and thin.. approx 2mm, and cut out rectangles. Mine were approx 2cm x 4cm.. again, this is dependent on the size of your cake.  Using your toothpicks, add two parallel indents in the rectangle (see photo). Paint with edible silver paint and allow to dry before adding to the cake. Also paint a bunch of toothpicks with the same silver paint and allow to dry.
Spacing your lugs evenly around the cake (I used 7.. not actually sure if this is factually accurate for a snare drum??), first attach the toothpicks. Simply slide the pointy end under the rim at the top/base of the cake, with a tiny bit of water. Then place the rectangle over the top. Simple!

I also added a logo/my brothers initials to the cake. I used a template to cut these out of white fondant and attached with water.
(Don't forget to remove the toothpicks before eating the cake!)

Monday, September 5, 2011

Beefcake – the greatest cake known to man. Tutorial: How to make a cake that looks like a steak!

It was my Daddy’s 50th Birthday last week and I had no idea what I was going to bake for him. A golf themed cake? Tour de France? Several brainstorming sessions with work colleagues resulted in various ideas being thrown back at me with a giant LAME attached to it.

It was one week out and I was getting desperate. I consulted MummyB. Surely after 20 something years of marriage she’ll know what he’d like. “Remember when his mates gave him the nickname ‘Beefcake’? What about a cow cake? With 50’s on it..? WAIT! A steak cake!!” The woman is a frickin genius.
I scoured the interwebs for inspiration and found loads of it. And it turned out to be one of the easiest cakes I’ve ever made. Everyone at the party loved it, even if they were a little turned off by it.

You will need:
Large slab cake and butter cream (or icing of your choosing)
Paper and pencil (for template)
Large knife

White fondant
Red gel food colouring
Vodka (or any clear spirit)
Fondant smoother
Foam meat tray (ask at your local butcher)
Glad wrap
Paper towel

Have a look at some of the inspiration I found online and draw a steak template on your piece of paper. Keep in mind that you will be covering the cake in two layers of fondant around the edges, so you will need to be generous with your cutting.
Once you’ve cut and filled your cake, give it a basic crumb coat. I followed up with a second layer of buttercream, but you don’t really have to for this cake. Let’s face it, steak doesn’t have that gorgeous sharp edge that we’re all so desperately seeking with our round and square fondant covered cakes. The more bumps and lumps, the better!
Next, roll out your fondant to about 5mm thick and cover the cake. As you can see, I tinted my fondant pink to act as a base for building a stronger colour. I think white underneath would have worked better – a few flecks of white showing through the red would have looked like streaks of fat. Lovely. Now the fun begins!
Grab your vodka, take a giant swig before pouring yourself a glass. Straight up. Then, pour a small amount into a shallow dish or bowl (I use an old jam jar lid). Next, drop a big dollop of red food gel into the vodka and gently mix. The reason why we are using food gel (and not ever, ever liquid colour!) is because we want a stronger colour and we also want some globby, clot-like bits (hence why I also put the vodka first, then colouring).

Rip off a bit of paper towel (or you could use a large, soft brush) and ball it up, dip it in the vodka/colour and sponge onto the fondant, no need to paint the sides. If you want more bloody-clots (and really, who doesn’t want more bloody-clots) then you can always smudge some food gel directly on the cake with your fingers, after you’ve put the vodka solution on.
You may be wondering why I have used vodka to dilute the colouring. It’s not just because it’s a refreshing beverage, particularly when mixed with soda water and lime, and it’s presence on the cake-decorating-table acts as an excuse to fuel my raging alcoholism. Ummm no. The vodka, or any clear spirit, will evaporate quickly and leave only the colour on your cake. If you dilute with water, the water will dissolve the sugar in the fondant and the whole thing will become a sticky, sweaty mess (see my 21st Birthday cake for an example of how NOT to paint a cake).

Once you are happy with the colouring on the top of your cake (don’t worry, we can add more later if need be), set aside to dry, preferably overnight.
Now we are going to add some FAT around the edge. A Niiiiice big ring of FAT! Measure the height of the cake and roll out your fondant so you have a few extra centimetres to work with. Brush a little water on the sides of your cake and whack your roll of fat on the side! As I said, you want some extra fondant on the fat so you have an overhang at the top. Trying to keep a realistic look, there is no need to be delicate – grab a pair of scissors and chop away at the excess. I cannot stress enough how simple this is, don’t try and make it neat and pretty. WE WANT MESS AND GORE!
Now take to the overhang with your fondant smoother and gently smooth onto the top of your cake. If you don’t have a fondant smoother, THEN GET ONE! But seriously, if you don’t then you can just use your hands, maybe a small (CLEAN) book?? Does anyone have any suggestions for substitute fondant smoothers? Anything? But when you do finally buy one, it will change your life forever. Seriously.
Once the sides are finished, grab some excess fondant and roll it in your hands so you have a ‘rope’ of fondant to use for the bone. Using your awesome powers of creativity, place the fondant ‘rope’ on the cake and shape it until you’re happy. Next we’re going to squash and smooth it out using our fondant smoother. Make adjustments as you see fit, cut off excess fat, trim the bone, add more blood, etc.
To finish off, I added a few more blobs of red gel, placed it on the foam tray and covered it in glad wrap. Doesn’t it just make you want to fire up the bbq? I also made a personalised label, with the expiry date as my Daddy’s birthday (this year) which made it look SUPER realistic. Hilarious!! Not unlike this photo..

Wednesday, March 23, 2011

Masquerade cake: Tutorial

Today we're going to learn how to make a gumpaste mask. But first, a more pressing matter. Check out this wicked apron I got for Christmas..


Tehaha Love it. Ok. Now onto more important things.. lets learn how to make this. 


You will need;
Gumpaste – any chosen colour

Cornflour
Rolling pin
Scissors
Knife
Baking paper
Cling wrap
Led pencil
Plastic Mask
Royal icing
Piping bag plus tips
Sparkles!!! Or any decorations you want to use, like peacock feathers.


First off, design your mask. It’s always a good idea to have a design idea before going in. I always sketch my designs while surrounded by inspiration. But be flexible, sometimes the best laid plans can go awry. I made two masks, because my first design sucked. Seriously. It sucked hard, kids!

You also need to make a template for your mask. I found a few I liked and made a variation of them.

Trace your template onto some baking paper and cut out. Next you will need to cut your template out of gumpaste, so prepare your bench top with a sprinkling of corn flour and roll your gumpaste to approximately 5mm thick. We want it to be thick and sturdy. 
Lay your template over the gumpaste and using a small, sharp knife cut out the mask, leaving the eye holes til last.
You may find that the gumpaste will shift as you are cutting it. No problem, just used your index finger to smooth out and shape the gumpaste so it’s all even. Then proceed to cutting out the eye holes. Now, be patient. Once you put this on the actual mask to dry, you’ll probably have to trim the eyes again to get them even.

Now that you have your mask, you'll want to get that realistic shape. Enter the creepy plastic face mask! So, to stop the gumpaste from sliding off, place a layer or two of cling wrap on the plastic mask. You will also want to raise the plastic mask so the gumpaste mask doesn’t dry with its tips sticking out like a pair of tiny wings. I stuck an upside down bowl under mine, which worked a treat!
Once dry, we start the fun bit.. Decorating! I also took the extra step of trimming my dry mask with a small knife, just to round off the corners and even the whole thing out. You may also want to redo the eye holes.
Assuming that the actual mask won’t be consumed, we’re going to use a bit of led pencil to trace our design on the mask (and honestly, who of us didn’t suck on or chew the living daylights out of some led pencils in primary school? Didn’t hurt me).


Ok so, grab some baking paper and trace the outline of your mask, including the eye hole (don’t use your original template because the shape of the mask will have changed).
Use this to draw your design onto. Once you have finalised it, flip the baking paper over and trace the outline of the design. Then, lay the baking paper over the mask (right side up) and rub over the outline again. This will transfer the led on the back of the baking paper onto your gumpaste. Use this technique to ensure all your design is even and consistent.
Now we have a lovely stencil to pipe over. Fill your piping bag with royal icing, coloured to your choice. I was using very dark green/almost back edible sparkles so I tinted my royal icing black. I also used a round #1 size tip, but use your discretion based on your design. Work in sections so the royal icing doesn’t dry before you sprinkle your decorations on top. If it does dry quickly, just grab a fine paint brush and paint with a little bit of water, then sprinkle your decorations on.

To finish I grabbed some peacock feather which I glued to the back with royal icing. Attach to the cake with more royal icing and voila! One beautiful masquerade birthday cake for a beautiful girl.. Happy Birthday Ashleigh!