Showing posts with label cake. Show all posts

Sunday, November 11, 2012

Ombre Wedding Cake Tutorial


I had the exhilarating task of making my SECOND wedding cake this year for my dear friends, Darcy and Elyse. The Bride sent me some inspirational photos of soft iced cakes and a colouring concept that I wasn't familiar with - ombre. While the faded colour of this cake may look challenging to achieve, it was actually really easy to pull off. Just make sure you do some bicep exercises leading up to the task because all that icing killed my arm!

Soft Iced Ombre Buttercream Wedding Cake - How to.

What you'll need.
2 x batches of butter cream icing (divided into 5 batches)
Bowls
Large flat blade cake spatular
Gel colouring in your chosen colour


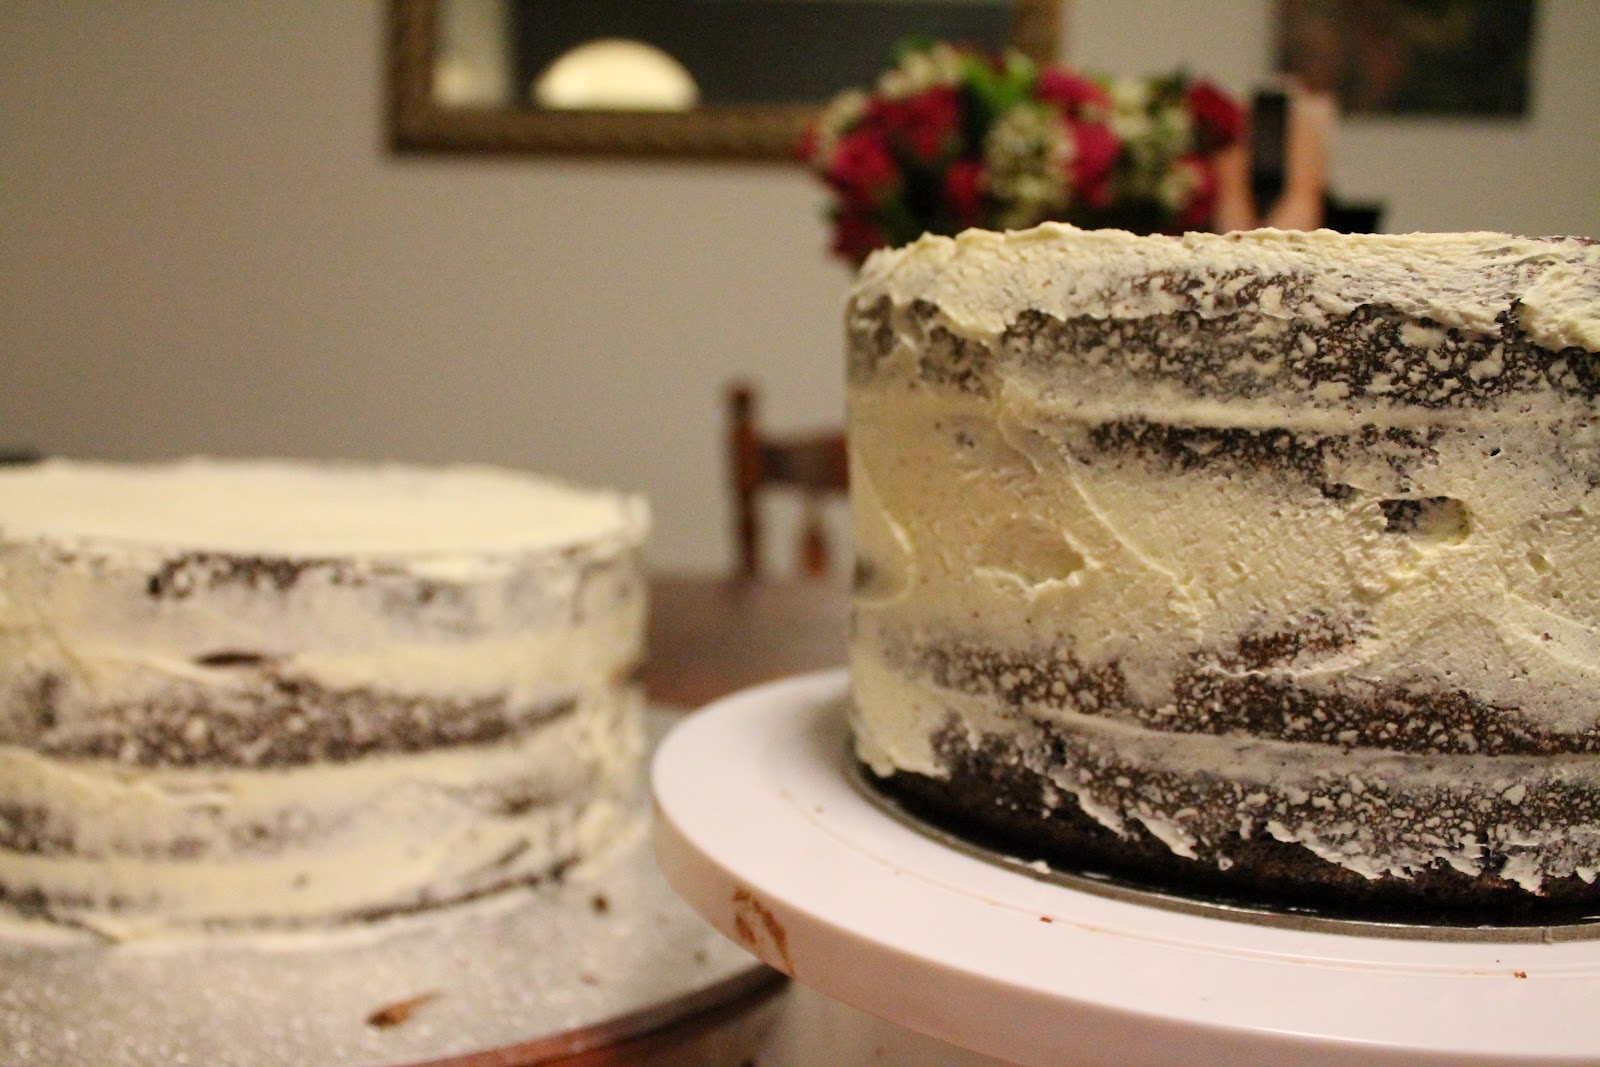
Start by filling and stacking your cakes, then cover in a thin crumb coat. Use uncoloured butter cream for this. Pop in the fridge to set.


While your cakes are in the fridge, start colouring your icing. I used four colours for my cake, fading from an off-white on the top down to a bright pink on the bottom. The best way to achieve the faded colour range is to work from the top/lightest colour down. You can always make you're icing darker, but it's harder to fix/lighten the icing once coloured. Don't start colouring the next batch of icing until you've managed to get the colour before it right. Try not to make the shades of icing too far apart, as they will blend and mix into each other once you put them on the cake. Also, don't forget that you will need more icing for the darker/base colours as there is more surface area to cover!


I'm trying to achieve a soft and textured look, so I don't have to worry about evenly icing the cake. Start by applying a thick layer of icing in your darkest colour to the bottom half of your base cake, I used a small butter knife to do this. Repeat with the second colour. 


Once the cake is covered in both colours, start to even out the icing with your large flat blade spatular. You will notice that once you start to smooth and even out the icing, the two colours will blend together slightly which makes the colours look as though they're fading into each other.


To achieve the rustic, soft iced look, I take my large flat blade spatular and hold it at a slight angle so the tip of it cuts into my icing as I spin my cake turntable.

I'm really happy with how this cake turned out - and so were the Bride and Groom, which is the most important part! It can be a little bit fiddly, but the overall look is so romantic and rustic. Well worth the effort!


And because it was by far the most beautiful wedding I've ever had the pleasure of attending, there is a lil' video I put together (all shot on my iPhone, hence the crappy quality!) But you get the idea - this video DOES NOT do the wedding justice, it was absolutely stunning!

Congratulations, Darcy and Elyse!! xxx


Darcy & Elyse's Wedding from Kimberley Burrell on Vimeo.

Tuesday, May 15, 2012

Chocolate cake for skinny people


My dear surrogate mother, Mumma Fish, recently had a birthday. She also recently lost like, a billion kilograms. Ok, not that much, obviously. She always looked fabulous, but now she looks crazy skinny fabulous. I wanted to make her a 'healthy' birthday cake but then I remembered that healthy is boring. So I made my super moist chocolate mud cake and put fruit on it, because fruit is healthy. And when you pair fruit with chocolate, it cancels out the calories. That's just science, really.

 Make yourself a super moist mud cake, then slice it in half. Make a big bowl of ganache. 2 parts dark chocolate, 1 part pure cream. We want this ganache to set hard.
 Fill the middle of the cake with ganache.
 Keep filling.. 
 Grab some luscious, plump, juicy, sexy berries. Wash and set aside to dry off.
 Ganache your cake. We're going for a rustic look, no need to be fancy.
Pipe a border to hold in all the fruit. If you don't have a piping bag, just use a thick plastic sandwich bag and snip off the corner.
  Pile on your luscious, plump, juicy, sexy berries.
 Add more berries for decoration. Dip them in melted chocolate. Or white chocolate. Whatever takes your fancy. You could dip them in sprinkles as well. Yeah, do that. I wish I had sprinkles. 
 Add more chocolate. Just because. 
 Serve on a vintage, sliver cake stand with matching candles (note: cake stand and candles are optional. You could just eat it with a spoon, standing along in your kitchen. That would work well too). 
Attempt to claim a large portion of the cake by licking a selected area. This is called 'dibs!' as demonstrated here by silly surrogate sister. She lost a small section of her tongue doing this. Kidding.

Tuesday, March 13, 2012

Drum Cake: Tutorial

Yo kids. Here is the Drum Cake tutorial. Enjoy!
You will need
1 round ganached cake
Rolling pin/corn flour
Fondant (1 batch coloured, 1 batch white for top of drum and accessories)
Tooth picks
Edible silver paint - available from all good cake decorating stores. You can use a luster dust, but I find this must easier to use and results in a better colour.
Water
Paint brush

This cake is pretty straight forward, but a tad bit fiddly at times. Take your beautifully ganached cake and cover it in your chosen colour fondant. Next, take your white fondant and roll out large enough to cover just the top of the cake - this will be the ‘head’ on your drum (also known as a drum skin).
Trim the edges of the white fondant - it doesn't need to look perfectly neat as we are going to add another ring of fondant.

Here is where it gets tricky - roll out a piece of white fondant the same diameter as the cake, about 3cm high (the height is dependent on the size of your cake.. measure a small bit and hold it up to your cake to get a better idea). Wrap this piece of fondant around the base of the cake, attaching it with a small bit of water applied with the paint brush.
Roll out a second piece of white fondant the same size.. this is where it gets tricky. You need to attach this piece to the top edge of the cake, while allowing it to edge above the top of the cake. I didn't do this, but in hindsight I would have measured out a ring of toothpicks that I stick into the cake for the strip of fondant to sit on top of. As I mentioned, this bit is tricky and a bit fiddly as the fondant is still soft. Once you are happy, and the fondant has had a little bit of time to dry and stiffen, paint it with the edible silver paint.
Now that you have the top and bottom ring of fondant attached, it’s time to add the accessories.. also known as the drum lug!
Roll out white fondant nice and thin.. approx 2mm, and cut out rectangles. Mine were approx 2cm x 4cm.. again, this is dependent on the size of your cake.  Using your toothpicks, add two parallel indents in the rectangle (see photo). Paint with edible silver paint and allow to dry before adding to the cake. Also paint a bunch of toothpicks with the same silver paint and allow to dry.
Spacing your lugs evenly around the cake (I used 7.. not actually sure if this is factually accurate for a snare drum??), first attach the toothpicks. Simply slide the pointy end under the rim at the top/base of the cake, with a tiny bit of water. Then place the rectangle over the top. Simple!

I also added a logo/my brothers initials to the cake. I used a template to cut these out of white fondant and attached with water.
(Don't forget to remove the toothpicks before eating the cake!)

Monday, September 5, 2011

Beefcake – the greatest cake known to man. Tutorial: How to make a cake that looks like a steak!

It was my Daddy’s 50th Birthday last week and I had no idea what I was going to bake for him. A golf themed cake? Tour de France? Several brainstorming sessions with work colleagues resulted in various ideas being thrown back at me with a giant LAME attached to it.

It was one week out and I was getting desperate. I consulted MummyB. Surely after 20 something years of marriage she’ll know what he’d like. “Remember when his mates gave him the nickname ‘Beefcake’? What about a cow cake? With 50’s on it..? WAIT! A steak cake!!” The woman is a frickin genius.
I scoured the interwebs for inspiration and found loads of it. And it turned out to be one of the easiest cakes I’ve ever made. Everyone at the party loved it, even if they were a little turned off by it.

You will need:
Large slab cake and butter cream (or icing of your choosing)
Paper and pencil (for template)
Large knife

White fondant
Red gel food colouring
Vodka (or any clear spirit)
Fondant smoother
Foam meat tray (ask at your local butcher)
Glad wrap
Paper towel

Have a look at some of the inspiration I found online and draw a steak template on your piece of paper. Keep in mind that you will be covering the cake in two layers of fondant around the edges, so you will need to be generous with your cutting.
Once you’ve cut and filled your cake, give it a basic crumb coat. I followed up with a second layer of buttercream, but you don’t really have to for this cake. Let’s face it, steak doesn’t have that gorgeous sharp edge that we’re all so desperately seeking with our round and square fondant covered cakes. The more bumps and lumps, the better!
Next, roll out your fondant to about 5mm thick and cover the cake. As you can see, I tinted my fondant pink to act as a base for building a stronger colour. I think white underneath would have worked better – a few flecks of white showing through the red would have looked like streaks of fat. Lovely. Now the fun begins!
Grab your vodka, take a giant swig before pouring yourself a glass. Straight up. Then, pour a small amount into a shallow dish or bowl (I use an old jam jar lid). Next, drop a big dollop of red food gel into the vodka and gently mix. The reason why we are using food gel (and not ever, ever liquid colour!) is because we want a stronger colour and we also want some globby, clot-like bits (hence why I also put the vodka first, then colouring).

Rip off a bit of paper towel (or you could use a large, soft brush) and ball it up, dip it in the vodka/colour and sponge onto the fondant, no need to paint the sides. If you want more bloody-clots (and really, who doesn’t want more bloody-clots) then you can always smudge some food gel directly on the cake with your fingers, after you’ve put the vodka solution on.
You may be wondering why I have used vodka to dilute the colouring. It’s not just because it’s a refreshing beverage, particularly when mixed with soda water and lime, and it’s presence on the cake-decorating-table acts as an excuse to fuel my raging alcoholism. Ummm no. The vodka, or any clear spirit, will evaporate quickly and leave only the colour on your cake. If you dilute with water, the water will dissolve the sugar in the fondant and the whole thing will become a sticky, sweaty mess (see my 21st Birthday cake for an example of how NOT to paint a cake).

Once you are happy with the colouring on the top of your cake (don’t worry, we can add more later if need be), set aside to dry, preferably overnight.
Now we are going to add some FAT around the edge. A Niiiiice big ring of FAT! Measure the height of the cake and roll out your fondant so you have a few extra centimetres to work with. Brush a little water on the sides of your cake and whack your roll of fat on the side! As I said, you want some extra fondant on the fat so you have an overhang at the top. Trying to keep a realistic look, there is no need to be delicate – grab a pair of scissors and chop away at the excess. I cannot stress enough how simple this is, don’t try and make it neat and pretty. WE WANT MESS AND GORE!
Now take to the overhang with your fondant smoother and gently smooth onto the top of your cake. If you don’t have a fondant smoother, THEN GET ONE! But seriously, if you don’t then you can just use your hands, maybe a small (CLEAN) book?? Does anyone have any suggestions for substitute fondant smoothers? Anything? But when you do finally buy one, it will change your life forever. Seriously.
Once the sides are finished, grab some excess fondant and roll it in your hands so you have a ‘rope’ of fondant to use for the bone. Using your awesome powers of creativity, place the fondant ‘rope’ on the cake and shape it until you’re happy. Next we’re going to squash and smooth it out using our fondant smoother. Make adjustments as you see fit, cut off excess fat, trim the bone, add more blood, etc.
To finish off, I added a few more blobs of red gel, placed it on the foam tray and covered it in glad wrap. Doesn’t it just make you want to fire up the bbq? I also made a personalised label, with the expiry date as my Daddy’s birthday (this year) which made it look SUPER realistic. Hilarious!! Not unlike this photo..

Tuesday, January 25, 2011

The Shoe Box Cake Tutorial: Part Two. How to make a gumpaste shoe

Next up is the flashy part. The bit that all us girls swoon over. We have hundreds of them in our wardrobe, but never seem to find the right pair when you’re rushing to get ready. Shoes, glorious shoes. Let’s make one.


What you will need;
Gum paste/Modelling paste (in your chosen colour, plus a little in white or black for the sole of the shoe)
Cornflour
Skewers
Small knife
Rolling pin
Royal icing (in same colour as the modelling paste)
Some old fondant or playdoh
Paper templates (see Cake Central)
Paper towel/Gladwrap/Baking paper
Water/Small paint brush
Sparkles!!!!!


You will need a few days to make the shoe, to allow for drying time.


Step one. Download the great templates from Cake Central. This includes the sole, the lining and the top of the shoe. It’s also a great idea to grab your favourite pair of shoes out of your wardrobe to use as a guide. Or just wear them while making the gumpaste shoe to make you feel pretty.
The templates you downloaded includes a building support, but I found it to be an unrealistic shape for the shoe, so I made my own support ‘step’. Using your sole template as a guide, mould the playdoh/old fondant into a ‘step’ that will ensure your shoe will dry in the right shape. I’d suggest using your own shoe as a guide to get the right height and shape to the ‘step’.
Dust your bench with cornflour (never use icing sugar, it will dry out and stain your fondant/gumpaste) and roll out your gumpaste to 5mm thick. Obviously, you can go thicker or thinner if you prefer. As this was my first attempt, I wanted to make sure the shoe would be stable, not thin and flimsy. Cut out your templates using the small knife. Repeat with the additional colour gumpaste for the lining of the shoe (you want this to be even thinner than the rest of the shoe, 1-2mm thick).
Using your thumb, gently rub the edges to make them nice and smooth. Place the sole of the shoe on your newly constructed ‘step’ (you may need to put a piece of paper towel down first to stop it from sliding off). Next, attach both the lining and top of the shoe to the sole with a little bit of water. When attaching the top of the shoe, use some scrunched up gladwrap to stick underneath to form the shape and keep stable. You may need a bit of extra water, but just be gentle and patient, and rub the edges to ensure they stick properly.
I also made my own template for the back of the shoe. Using some baking paper and my own stiletto, I traced the back section of my stiletto and cut out a template that would suit my gumpaste shoe. Again, I used some water and gentle pressing to ensure the back was secure, and then scrunched up a ball of gladwrap to keep it in place.
Next up, the heel. I wanted a stiletto. No chunky, old woman heel here. We’re talking about neck breaking-ly high stiletto! In order to get the heel to line up flush with the sole of the shoe, I made another template to use as a guide. Simply trace the back section of the shoe/sole template that you downloaded from cake central. I then used this to hand mould the heel to the right size. Take a ball of gumpaste and mould until it is the right size (using the template), insert a skewer in the middle and use this to mould the gumpaste around for your stiletto (this will also come in handy when placing the shoe on top of the cake). Start rolling the middle section in-between your hands to thin it out and form the actual stiletto. Again, it’s a great idea to have your own stiletto handy, so you can see exactly the shape you will need for a realistic looking heel. This all takes practice; I remade my heel three times before I got it to the shape I wanted. I also took my small knife and cut off excess gumpaste around the top of the heel.
(Template used to shape the top of the heel)

You will now have two parts that will need to be assembled, the shoe and the heel. The next step is the most important - drying the entire shoe. If it ain’t dry, it’ll collapse! I gave myself plenty of time to ensure my shoe would dry. Chatting with the owner of my local cake decorating shop, she suggested putting the shoe in a cardboard box. Basically, you need somewhere that will stop the moisture getting into your gumpaste so it can dry. Unfortunately, I didn’t have any luck. Two days in, there was no sign of drying. Bugger. I jumped online to do some research and found this handy tip. If you ever need to dry gumpaste really quickly, then whack it in an oven (TURNED OFF!) with the light on. Obviously, because the area is completely sealed, it is also completely moisture free. I’m not sure exactly why the light has to be on, I think it must be to help draw the moisture out of the gumpaste. But it worked. About eight hours later, my shoe was completely dry. As a safe guard, I left it in there over night.
(Preparing the heel with royal icing to attach to the sole of the shoe)

Now comes the fun bit – drowning the shoe in sparkles! Obviously you don’t have to use sparkles; you can decorate the shoe any way you want. I coated my shoe in a fine layer of water and sprinkled the sparkles on. The water will dissolve the sugar in the gumpaste, which obviously becomes sticky, allowing your sparkles to adhere to the shoe.
Next we need to assemble the shoe. Not as scary as it sounds. You will need your royal icing (in the same colour as your shoe) and a box on which your shoe can sit. I also grabbed a cardboard tube from my roll of paper towel to insert under the shoe, just as a safe guard against any sliding or collapsing!
Punch a hole in the upside down box so you can insert the end of the skewer that your heal is on. Then, cover the top of the heel with royal icing. Gently place the shoe on top of the heel, lining it up to the edges are flush. If the edge isn’t lining up perfectly, don’t worry! just use a bit of extra royal icing to fill in the gaps and smooth. Leave for at least 24 hours to ensure the royal icing dries completely.
You will probably have some gaps around the back of the shoe which you’ll need to cover in sparkles, or any decoration you are using. Just wait until the royal icing dries and stick on sparkles with a little water.
(As you can see above, I used a variety of household objects to keep my shoe in place while it was drying.. paranoid much?)

Annnnnnddd you’re done! It’s really that simple. For extra detail I also added a small ring of black gumpaste to the bottom of the heel. I cannot stress enough the importance of having a contingency plan, i.e. MAKE A SPARE SHOE! The shoe in this tutorial was my first attempt, while the shoe you see sitting on the cake is attempt number two. Not only does it allow you to practice, but it’s also a safe guard should anything go horribly wrong with transporting the cake. Trust me, always have a spare! I learnt that the hard way. I also did not transport the cake assembled. I waited until I got to the venue to secure the shoe on top of the cake. Seriously, you should have seen my car with all the towels and bubble wrap. It looked like I was transporting a bomb! Once at the venue, I used a small amount of royal icing on the front of the sole of the shoe, and the skewer on the heel inserted straight into the cake.

(Photo credit: Ben Wares Photography)

Hopefully you find this useful; I can now see it is a lot of information to digest! But feel free to leave me any questions.

Peace out, cake dudes!

Friday, January 14, 2011

The Shoe Box. Tutorial Part One - The Box

Hello Kidlets! Welcome to 2011. Hope everyone had a lovely Christmas and New Years.
Sorry it’s taken me so long to get back here. I was shaking my booty at Falls Festival for New Years, and then I returned home to a nasty case of bronchitis! Thanks, 2011! Ya big jerk.

When I left you last year I had just completed a 21st Shoe Box cake. Remember? Good. Great. On we go.

As promised, here is Tutorial Part One of ‘The Making of the Shoe Box Cake’. In today’s lesson we will be learning how to make the box, and get those super straight edges that make it look realistic.

You need to set yourself at least two days to complete the box. One for the ganache to set, and one for icing the cake with fondant.

**I cannot apologise enough for the HORRIFIC photos that accompany this post. Would you believe me if I said it wasn’t my fault? My camera died in late December and unfortunately Santa forgot that I moved this year. I’m thinking he must have left my brand new SLR somewhere else.. hmmm? So these pics were take on my mobile phone. **

What you’ll need
2 x rectangular mud cakes (size depends on how big you want your box. I do not have that exact size cake tin so I will show you a tip for cutting your cake to size).
Fondant
1 large batch of chocolate ganache (because it’s Summer I used 2:1, that is two parts chocolate one part pure cream so the ganache sets real hard)
Long skewers
Apricot syrup/pastry brush (Dissolve one part apricot jam in two parts boiling water and strain).
Large knife
Small knife
Cake board
Cake Spatula/Palette knife
Cake scraper
Tall glass with boiling water
Baking paper
Baking tray

Day 1 – Ganaching the cake. Using a skewer, aerate the cake with lots of little holes, then liberally brush with apricot syrup. This will ensure your cake stays super moist. Once the syrup has soaked in, whack a good amount of your ganache on the bottom of your cake board, then place one of the cakes on top. This will stop it sliding around. Next whack some more ganache on the top of the first cake so you will end up with a nice layer of ganache between the two. Then carefully put your second cake on top, lining it up evenly with the bottom.

Now, if you need to cut your cake to size, here is a good tip. Grab your ruler and measure where you need to cut the cake. Use the skewers to mark out where to will make the cut. Push them all the way through the cake. Now, use these to guide your knife as you cut so that you get a straight edge.
Now the important part, the ganaching of the cake! Using your spatula, grab a generous amount of ganache and go to town on that bad boy, starting on the sides of the cake. What we are doing is called a crumb coat, and only needs to be rough so it gathers up all the crumbs that keep falling off the cake. Once you’ve done the sides, get started on the top. Now, leave the cake for as long as you possibly can to set. If you are time poor, there is the cheat method of popping the cake in the fridge or freezer for 15 minutes or so.
Once the ganache is set, we will start on our SECOND layer of ganache. This layer needs to be smooth and crisp, or the bumps and lumps will show through the fondant. Again, starting with the sides, use your palate knife to coat the cake in ganache. Now, to get the perfect, straight edges that we all so desire in a cake, we’re going to use our cake scraper to level out the ganache, and remove any excess. This takes A LOT of practice – I still haven’t got it right, but it will definitely make the cake look a lot more professional if you give it a good try. Leave the cake in a box in a cool space to set overnight. Never put your ganached cake in the fridge for extended periods of time, because it will sweat once brought back to room temperature. Also, because you’ve cooked the cream that is in the ganache, there are no issues with leaving it unrefrigerated.

Day 2 - Looking good? Excellent. Once the second layer has set, we will ‘hot knife’ our cake to really smooth out any final lumps and cut off any excess ganache that may have built up around the top edge. I use my spatula for this because it is metal and retains the heat. Just dunk it in the glass of boiling water, wipe off the water with a tea towel and run the spatula along the sides and edges of the cake. The hot knife will melt any excess ganache right off your cake.

Now, once the ganache has set again (this won’t take long as you haven’t applied a whole new layer), it’s time for the fondant! We’re going to be making four panels that we will stick to the side of the cake, as opposed to the more traditional method of covering a cake in fondant with one big piece of icing.

Measure the sides of your cake and make a template out of baking paper, then roll your fondant out to about 1 cm thick (if your cake is still a little lumpy, roll the fondant thicker. This will help to hide the lumps). Using a small knife, cut out the side panel, pop it on a baking tray lined with baking paper and whack it in the freezer. Now, don’t freak out! We’re only going to leave it in there for a little bit, 15/20 minutes max. I promise! This will harden the fondant slightly and make it easier to stick onto the cake as a panel. I’d recommend checking your panel every 5 minutes. We don’t want it to freeze, but we just want it stiff enough that you feel comfortable that it won’t slide off your cake.
Once ready, brush a little water or apricot syrup on the side of the cake and stick the panel on. Now, repeat with the remaining three sides. When attaching the next panel, brush a little bit of water on the edge of the first panel so the two join properly. Because they are stiff, you shouldn’t have any issues with warping the panel by pressing on the two to join them.
If you’re anything like me, your measurements may not have been perfect and you’ve ended up with a bit of excess overhang at the top. Measure the panel and mark where you need to cut using a skewer. Use a small knife to cut off the excess, and volia!

Now you should have a beautiful box. Because we’ve used this technique, and not just laying one piece of fondant over the cake, we end up with perfect, sharp joins to create a realistic box look.

Next, the lid. We’re going to make another template based on the size of the top of the cake, plus adding an inch or two depending on how big you want the lid to be. I made my template a bit bigger than what I needed, so I had the option to cut some off and straighten the edges once it was on the cake.

So, once you have your template made, roll your fondant to about 1.5cm thick, cut out the fondant and place on the top of the cake (because you’ve made the lid bigger than needed, you can just eyeball the placement).

Now you’ll need to trim the corners. Pinch the corner together and using a pair of scissors cut away the excess fondant. While the fondant is still pliable, rub and mould the fondant to the corner (use some water if need be).
One you’ve finished all four corners, you’ll now need to even out your edges. Measure the size you want for your lid and mark where you need to cut with a skewer. Using a small knife, slice off the excess fondant.
Ta-dah! Now you should have a lovely, realistic box.
Phew! I hope this is comprehensive enough for you all. Feel free to ask me any questions, or even if you’ve got some tips of your own - I’d love to hear them!

Next up, the shoe. Stay tuned folks!